
Rainbow POS User Guide
This guide uses the fictional Rainbow Cha Chaan Teng to demonstrate the current Rainbow POS workflow. The restaurant name, menu items, customers, orders, and sales figures shown in screenshots are demo data only.
Merchant-defined data, such as Chinese dish names, remains in its original language when the POS interface is switched to English.
Guide Contents
First-time setup
- Register and sign in
- Set up restaurant details
- Create floors and tables
- Create kitchen stations
- Build the menu
- Configure modifiers and combos
- Set payment methods
- Set up printers
Daily operations
- Open a shift
- Open a dine-in table and place orders
- Create takeaway, pickup, and delivery orders
- Run kitchen service with KDS
- Apply discounts and take payment
- Clear a table
- Close a shift and reconcile cash
Advanced features
- Split a bill
- Manage reservations
- Manage members and customers
- Create promotions
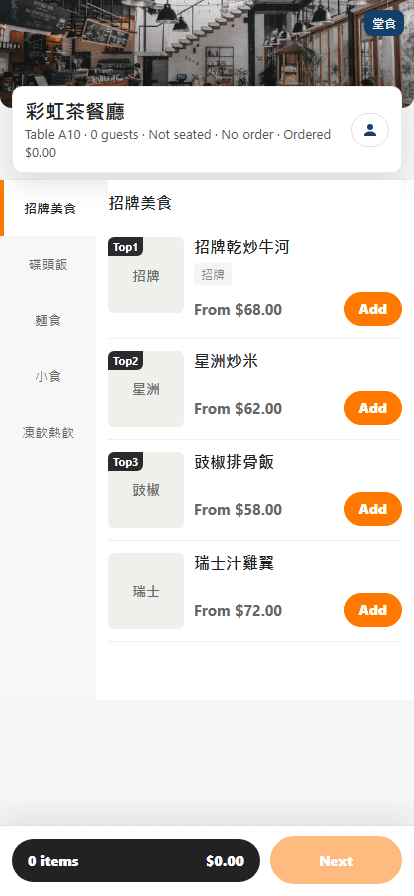
- Let guests order by QR code
- Manage inventory
- Review sales and operations
- Use Rainbow POS AI
- Troubleshooting
First-time Setup
1. Register and sign in
Create a trial account
- Open the Rainbow POS registration page.
- Choose email or mobile registration.
- Enter the email address or mobile number and select Send verification code.
- Enter the verification code.
- Enter the restaurant name, cuisine type, and a secure password.
- Select Create account.
- Continue to the initial setup flow.
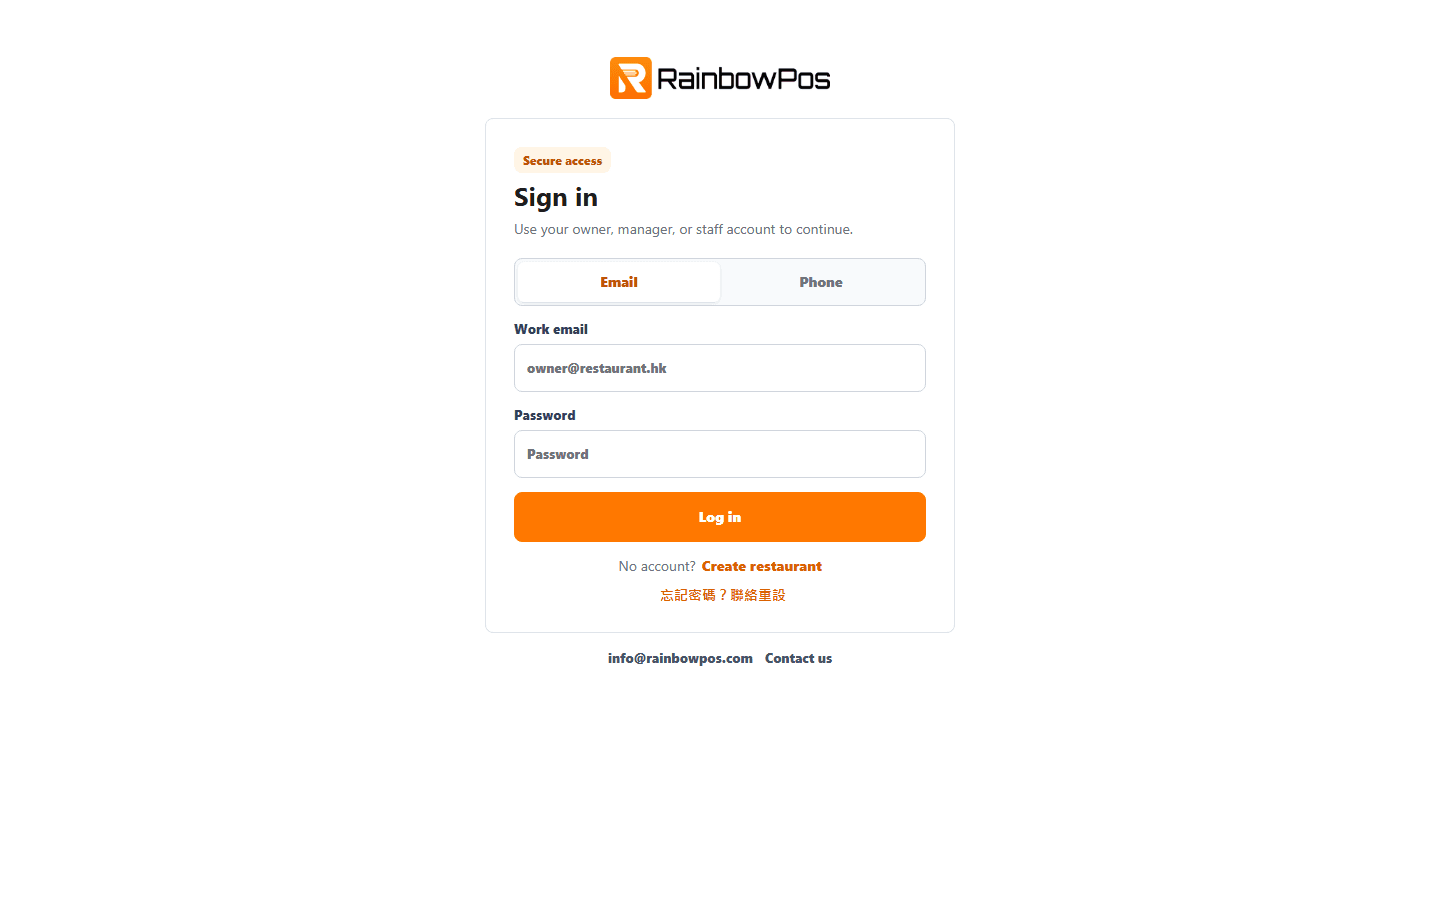
Sign in
- Open the Rainbow POS login page.
- Enter the registered email address or mobile number.
- Enter the password and select Sign in.
- The Floor screen opens after a successful sign-in.
2. Set up restaurant details
- Select the gear icon to open Settings.
- Open Restaurant details.
- Enter the restaurant name, address, contact details, and opening hours.
- Set the correct time zone. Hong Kong restaurants should use the Hong Kong time zone.
- Choose the primary interface language.
- Select Save.
The time zone controls business dates and promotion schedules, so verify it before going live.
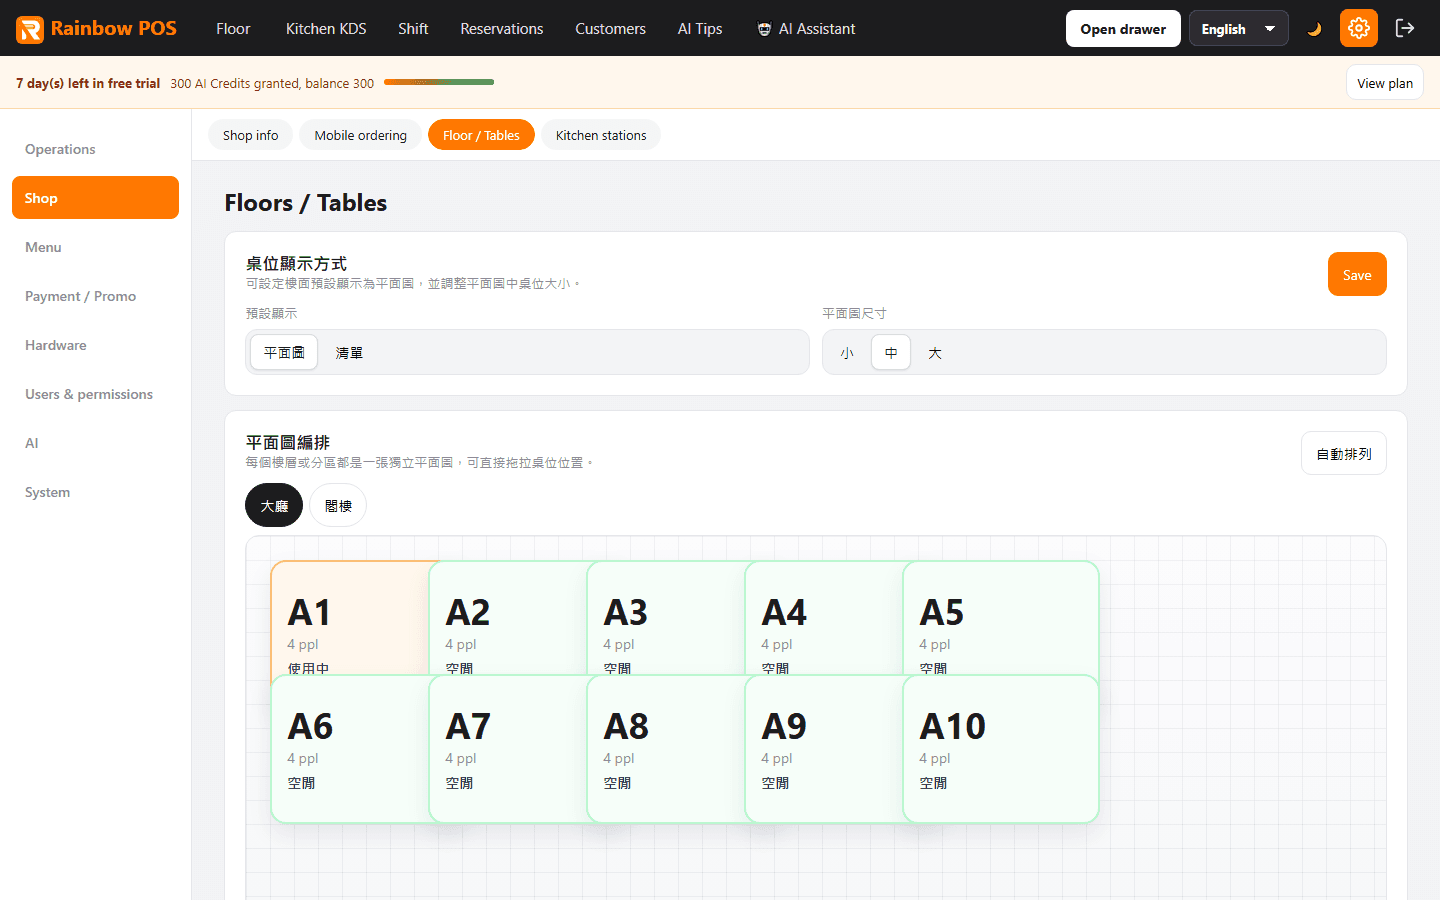
3. Create floors and tables
Create a floor or service area
- Open Settings > Tables.
- Enter a floor or area name, such as Ground Floor, Mezzanine, or VIP Room.
- Select Add floor.
- Drag floors to change their display order when required.
Create tables
- Select the floor.
- Add tables individually, or use Bulk create.
- For bulk creation, enter the quantity, table prefix, and seats per table.
- Save the tables and arrange them on the floor plan.
- Make sure every POS table label matches the physical table sign.
4. Create kitchen stations
Kitchen stations route items to the correct preparation area, such as Wok, Noodles, Snacks, or Drinks.
- Open Settings > Kitchen stations.
- Select Add.
- Enter the station name and choose an identifying colour.
- Select Save.
- Assign each menu item to its station when editing the menu.
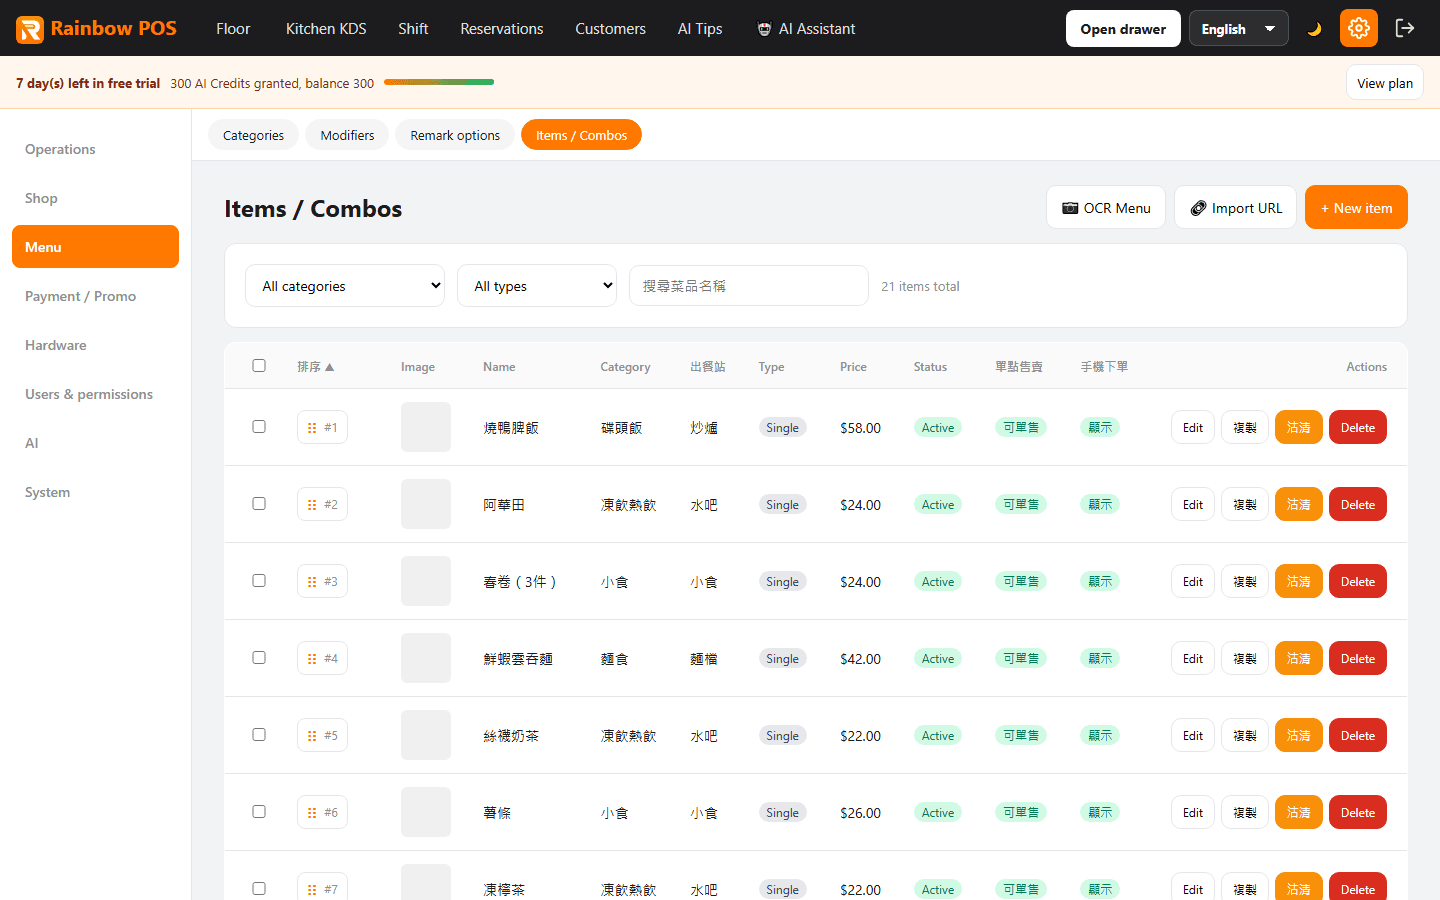
5. Build the menu
Add categories
- Open Settings > Categories.
- Enter a category name and select Add.
- Drag categories into the desired order.
Add dishes
- Open Settings > Menu.
- Select Add item.
- Enter the item name and selling price.
- Choose its category and kitchen station.
- Configure availability hours, daily limits, or sold-out status when needed.
- Select Save.
- Check that the item appears in the correct ordering category.
6. Configure modifiers and combos
Add a modifier group
- Open Settings > Modifiers.
- Enter a group name, such as Sweetness or Extras.
- Choose single-select or multi-select and select Add.
- Add each option and any extra price.
- Open the relevant dish in Settings > Menu.
- Attach the modifier group and save.
Build a combo
- Open or create the combo item in Settings > Menu.
- Open the Combo contents tab.
- Add groups such as Main, Drink, or Side.
- Set the required quantity and any supplement price.
- Test the combo in the ordering screen before service.
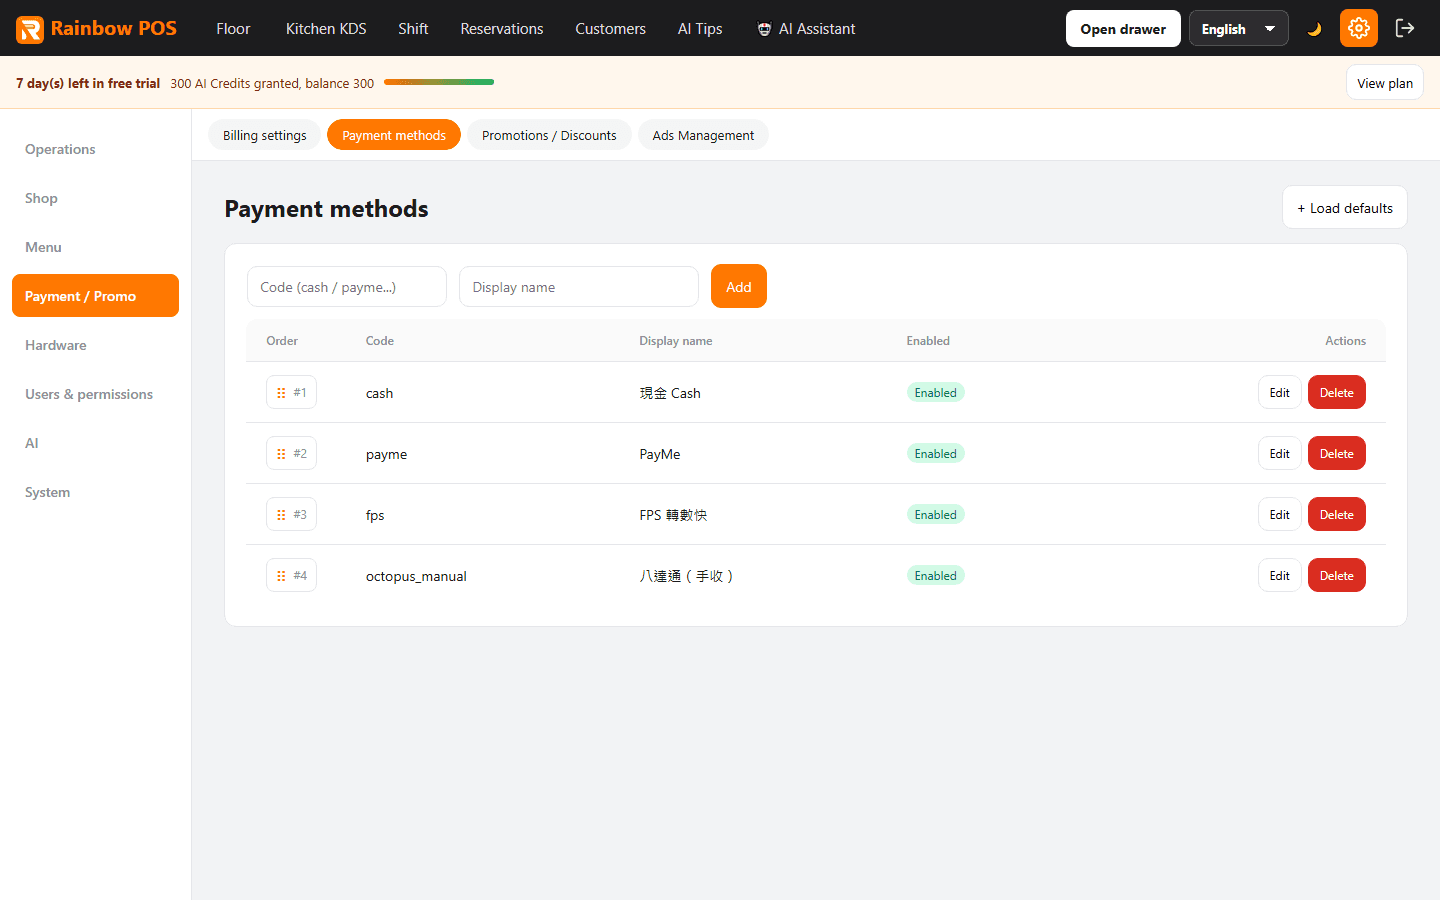
7. Set payment methods
- Open Settings > Payment methods.
- Load the defaults or add the methods accepted by the restaurant.
- Typical methods include Cash, Octopus, FPS, PayMe, and Card.
- Save and open a test checkout to confirm the buttons appear correctly.
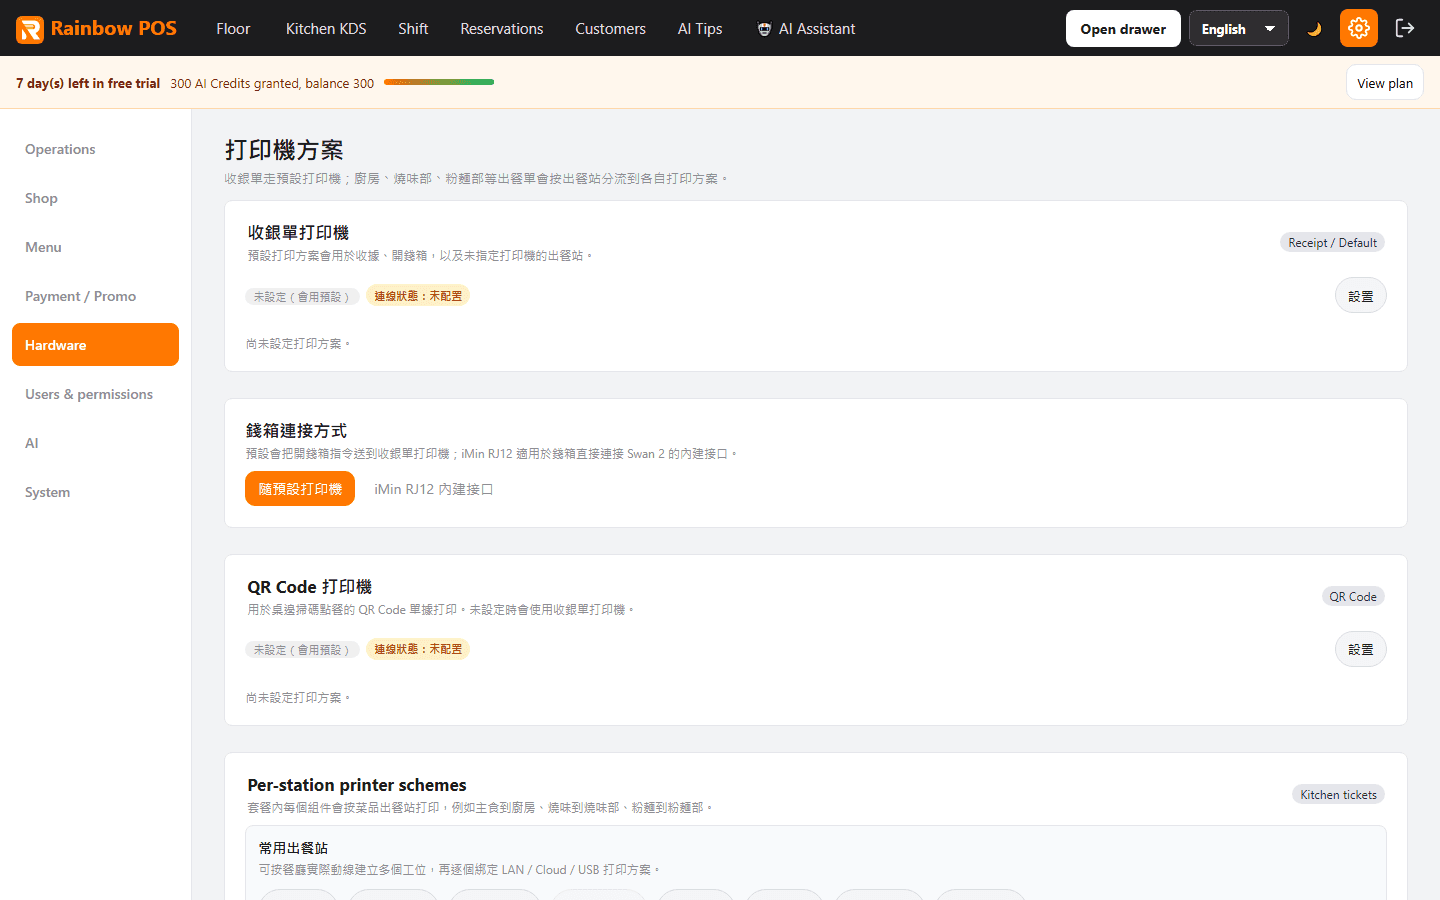
8. Set up printers
- Open Settings > Printers.
- Add a receipt or kitchen printer.
- Choose LAN, USB, or cloud connection.
- Assign the printer to receipts or a kitchen station.
- Select Test print and verify Chinese text, paper cutting, and routing.
| Connection | Best for | Check before service |
|---|---|---|
| LAN | Printers on the restaurant network | Correct IP and local print bridge running |
| USB | Printer connected directly to the POS device | Browser or POS app has USB permission |
| Cloud | Remote print service | Device and print service are online |
Daily Operations
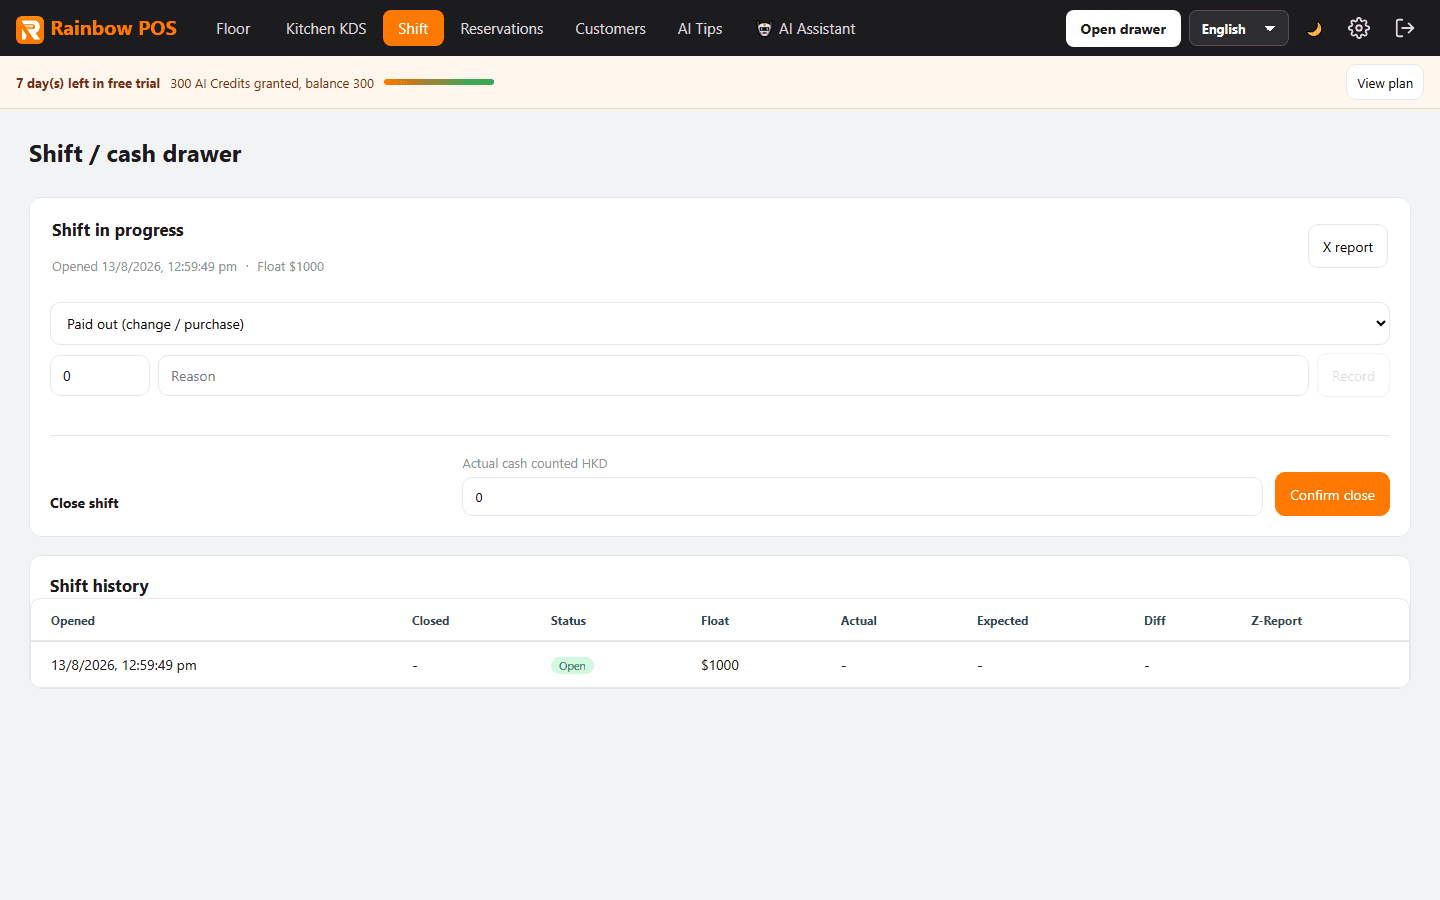
9. Open a shift
- Open Shift from the top navigation.
- Enter the opening cash float.
- Select Open shift.
- Confirm that the current shift and opening time are displayed.
Record every non-order cash movement, such as adding change, petty cash spending, or removing excess cash. Enter the amount and reason, then select Record.
10. Open a dine-in table and place orders
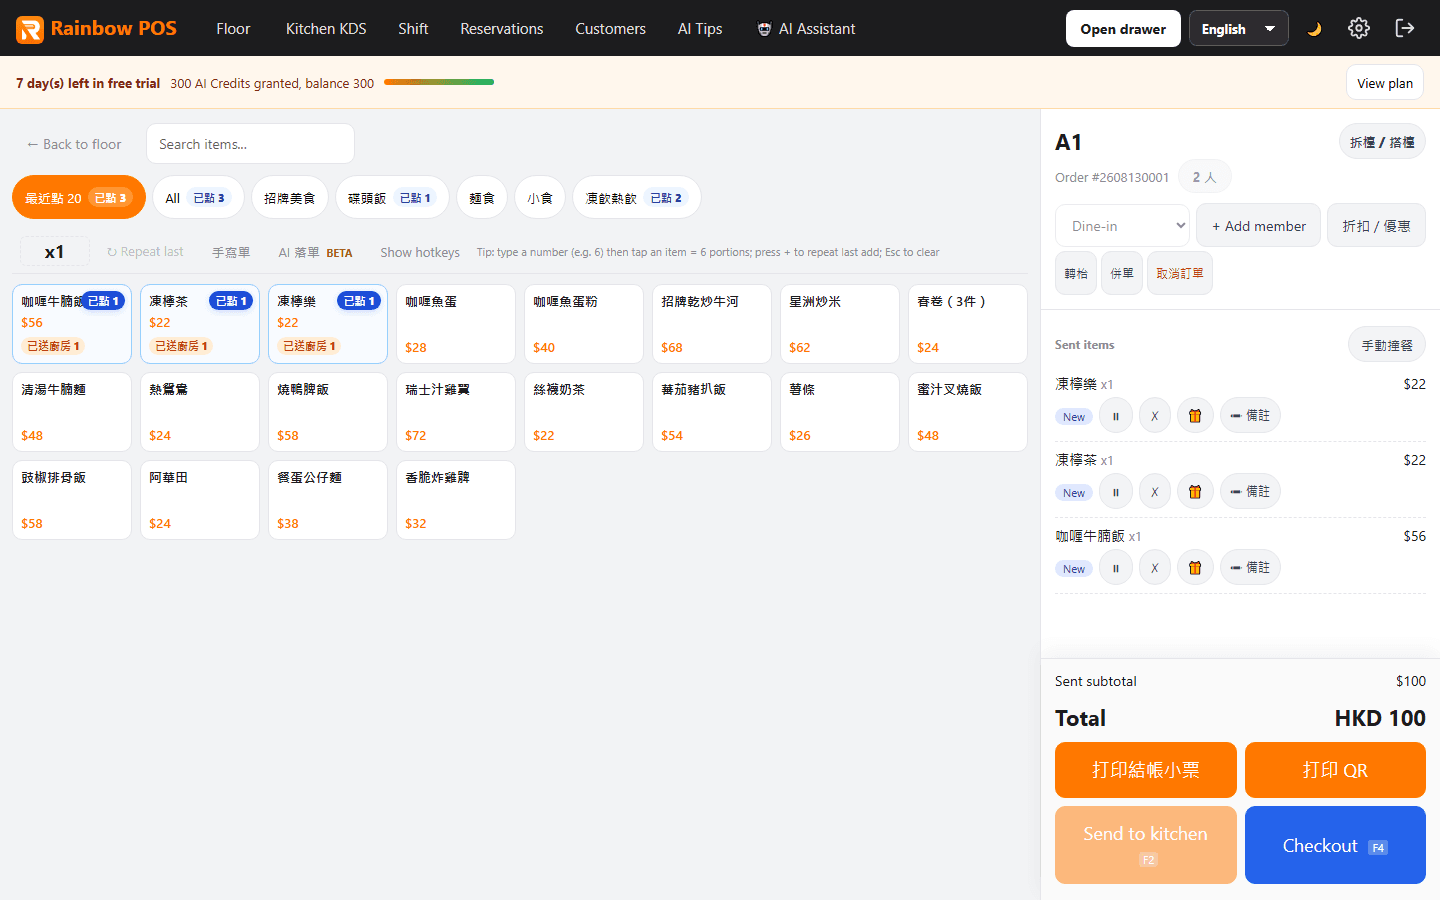
The left side of the ordering screen contains categories and dishes. The right side separates Sent items from items not yet sent to the kitchen.
First order for a table
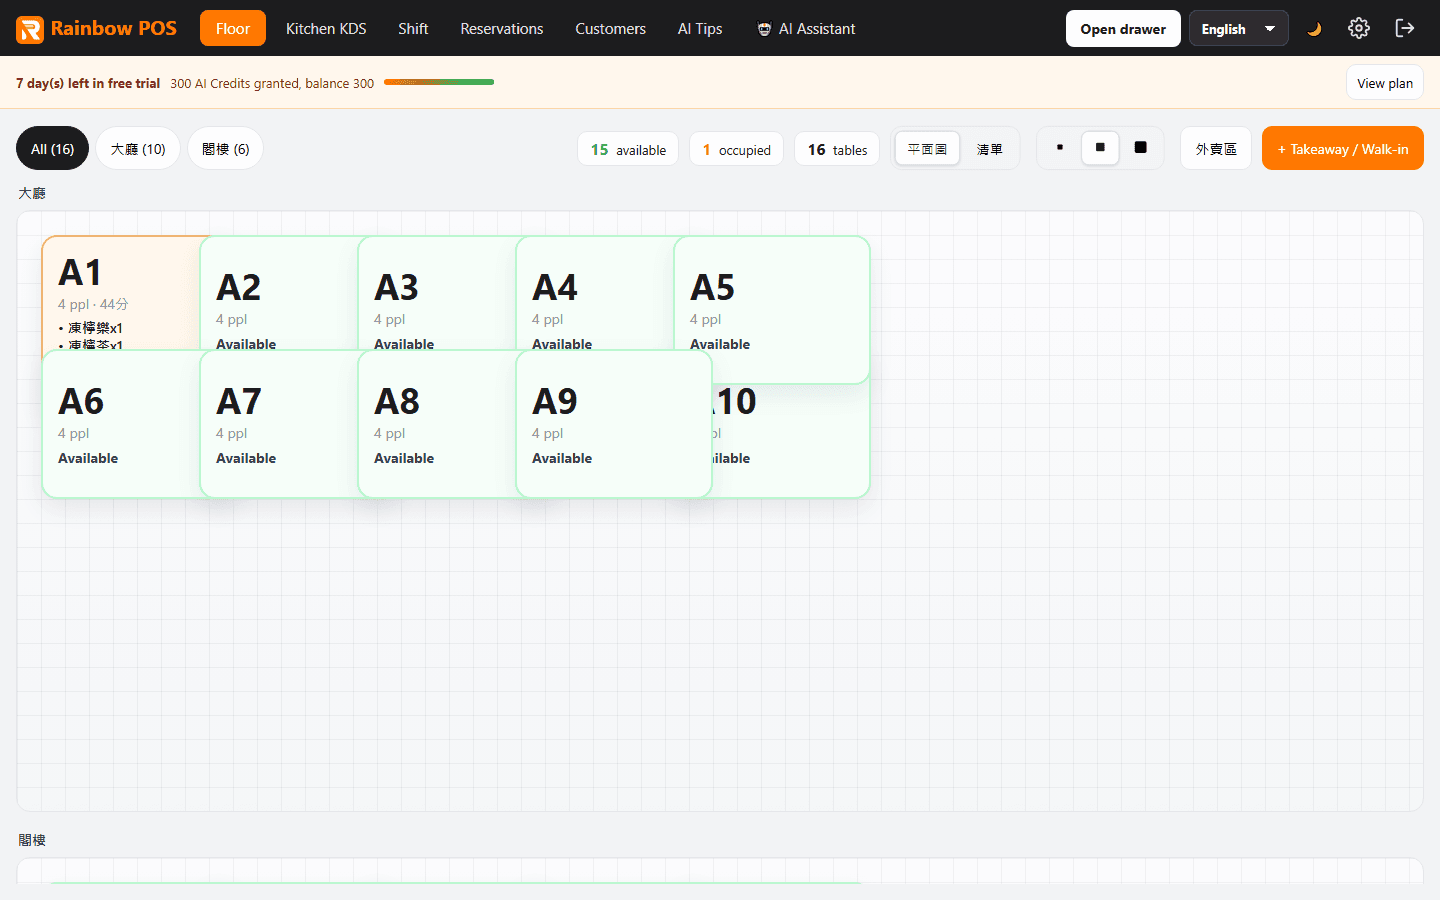
- On Floor, select an available table.
- Select the number of guests.
- The order opens as Dine-in.
- Search or browse categories, then select dishes to add them to the unsent area.
- Complete any modifier or combo choices.
- Adjust quantities and add item notes when required.
- Check the table, guest count, dishes, modifiers, quantities, and total.
- Select Send to kitchen or press F2.
- After sending, the system creates the order and returns to the floor.
Add items to an existing order
- Return to Floor and select the occupied table.
- Rainbow POS opens the existing order instead of creating another one.
- Existing dishes appear under Sent items.
- Select the additional dishes; they appear in the unsent area.
- Check only the newly added items.
- Select Send to kitchen again.
- Only the new unsent items are sent; earlier items are not duplicated.
Receive a guest QR order
- The guest scans the table QR code.
- They select dishes and modifiers, then select Next and Confirm order.
- If the table has an open order, the new items join it. Otherwise, a new order is created.
- Rainbow POS displays a QR-order alert on the floor.
- Staff open the table and check the QR items in the unsent area.
- Staff select Send to kitchen after checking availability, notes, and duplicates.
QR items are not sent to the kitchen automatically.
Remove an unsent item
- Find the item in the unsent area.
- Use minus to reduce quantity, or select Remove to delete the line.
- Check the order total.
No manager PIN, reason, or cancellation ticket is required because the kitchen has not received the item.
Void a sent item
- Find the item under Sent items.
- Select the X / Void action.
- Choose a reason category and optionally add a note.
- Enter the manager PIN and confirm.
- Check that the item is marked void.
If the item was fired and void-ticket printing is enabled, the relevant kitchen station receives a cancellation ticket.
Cancel the whole order
- Open the active order.
- Select Cancel order.
- Choose a reason and optionally add a note.
- Enter the manager PIN and confirm.
- Rainbow POS marks the order void and keeps an audit record.
- Fired items generate cancellation tickets only when void-ticket printing is enabled.
- The table becomes available when it has no other open order.
11. Create takeaway, pickup, and delivery orders
- On Floor, select + Takeaway / Walk-in.
- Choose Takeaway, Pickup, or Delivery in the order type selector.
- Add dishes, modifiers, and notes.
- Select Send to kitchen.
- Use the takeaway area to monitor active orders without tables.
- Complete checkout before collection or delivery.
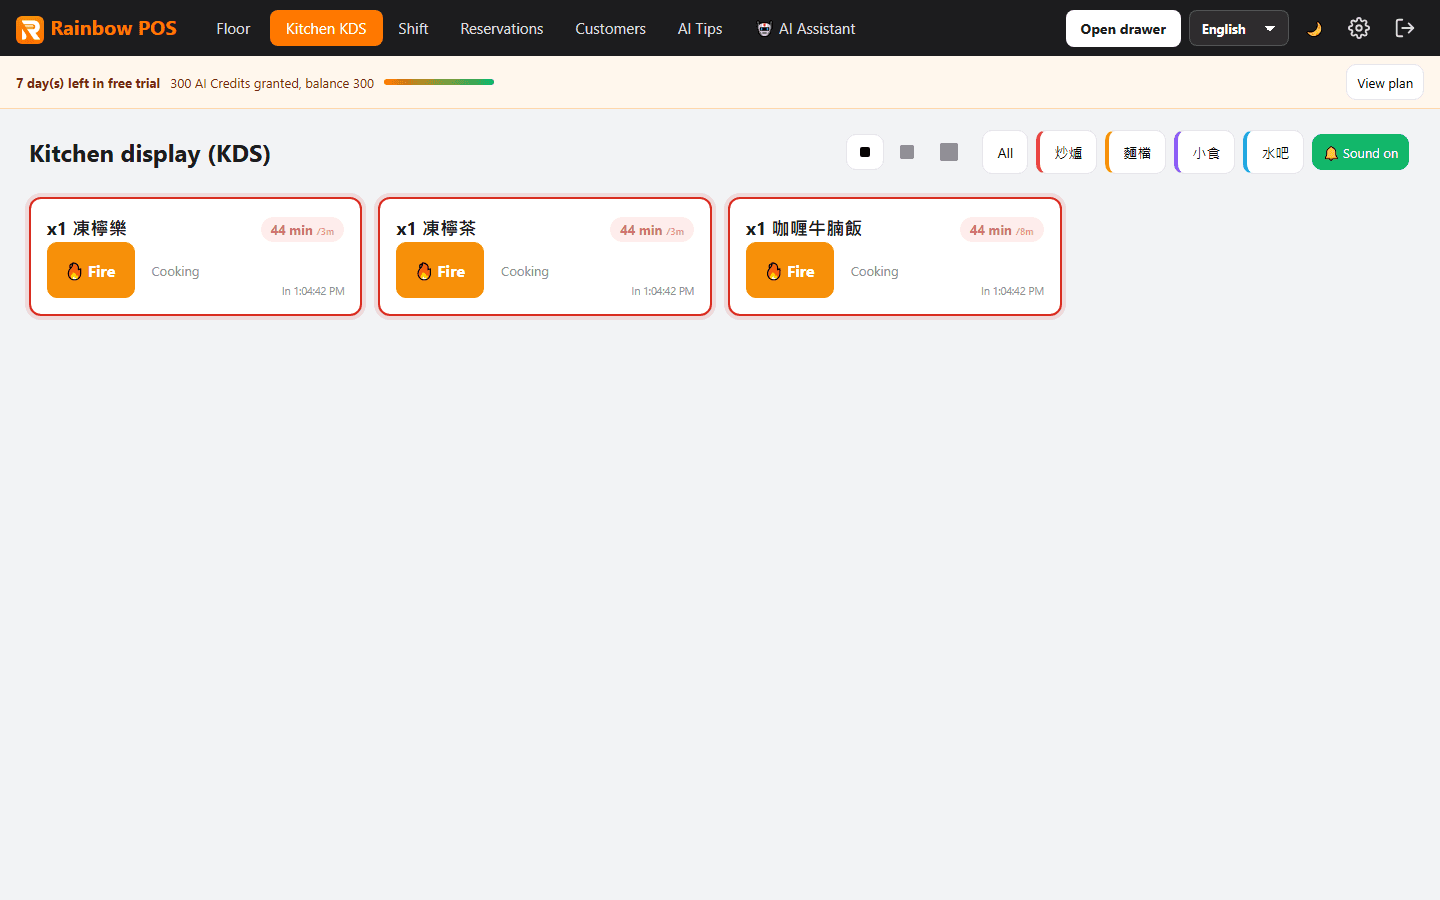
12. Run kitchen service with KDS
Enable KDS in Settings > Display before use.
- Open Kitchen KDS.
- Choose a station or the all-stations view.
- For a new item, select Fire / Cooking.
- Select Complete when preparation is finished.
- Select Serve when the item leaves the kitchen.
- Enable sound alerts if required.
13. Apply discounts and take payment
Apply a discount
- Open Discount / Promotion on the order.
- Enter a promotion code or select an allowed manual discount.
- Enter a manager PIN if requested.
- Check the discount and amount due.
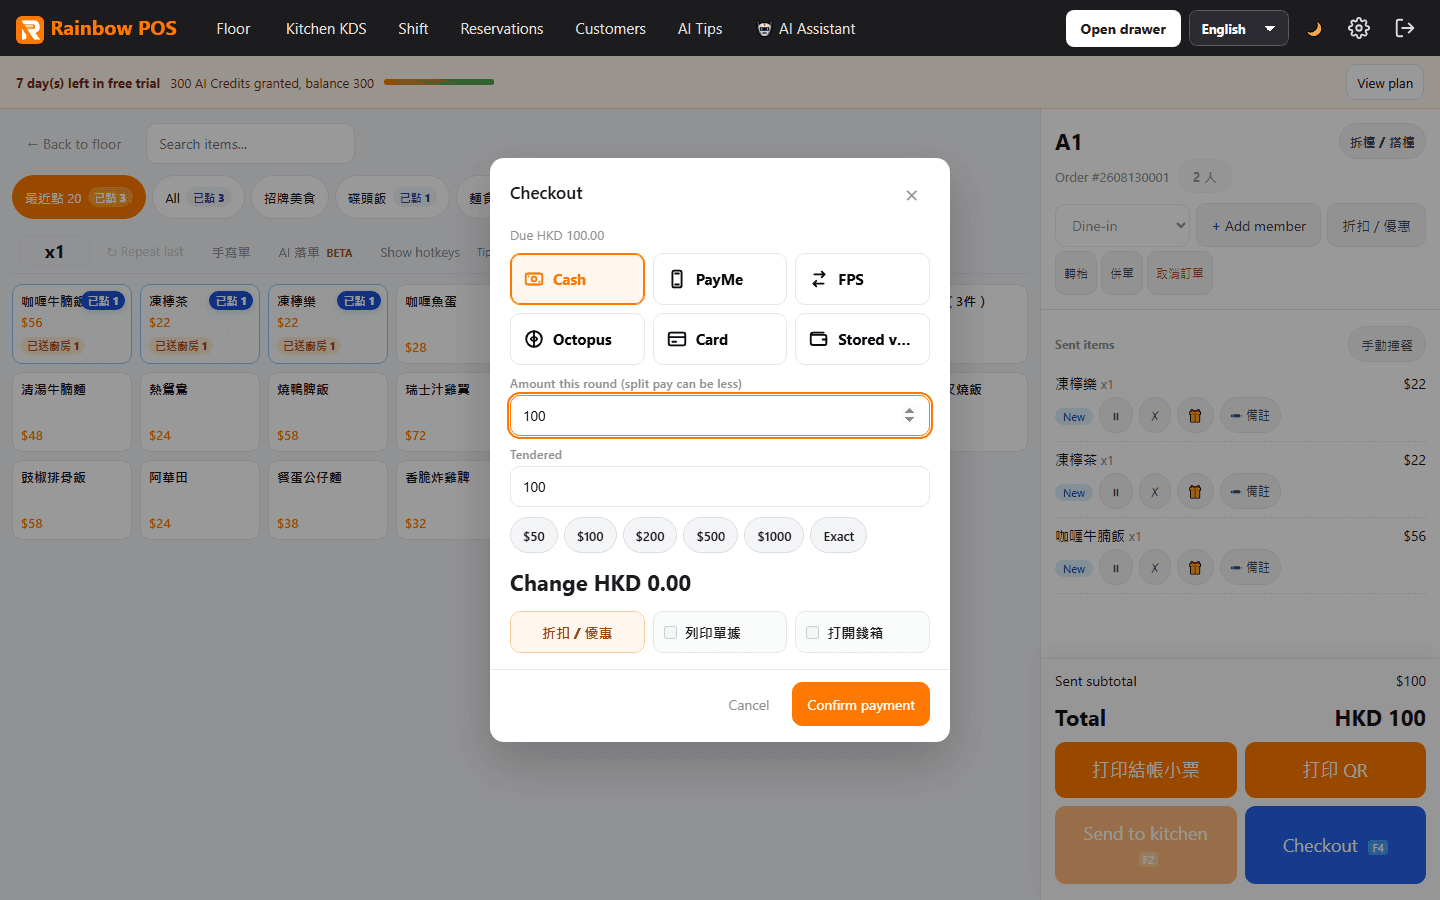
Take payment
- Select Checkout or press F4.
- Choose a payment method.
- Enter the amount for this payment.
- For cash, enter the amount tendered or select Exact.
- Check the change due.
- Select Confirm payment.
For mixed payment, take a partial amount with the first method, then collect the balance with another method.
14. Clear a table
- Confirm that the order is fully paid.
- Return to Floor.
- Select the paid table and choose Clear table.
- Confirm that the table returns to available status.
15. Close a shift and reconcile cash
- Open Shift after service.
- Confirm that all cash-in and cash-out movements are recorded.
- Count the actual cash in the drawer.
- Enter the counted cash.
- Select Confirm close shift.
- Compare expected cash, counted cash, and variance.
- Open the Z report and check sales and payment totals.
Advanced Features
16. Split a bill
- Open the order from Sales and enter Split bill.
- Select + New split as required.
- Allocate dishes to each split, or select Equal split and enter the number of guests.
- Check each subtotal.
- Checkout each split separately until all are paid.
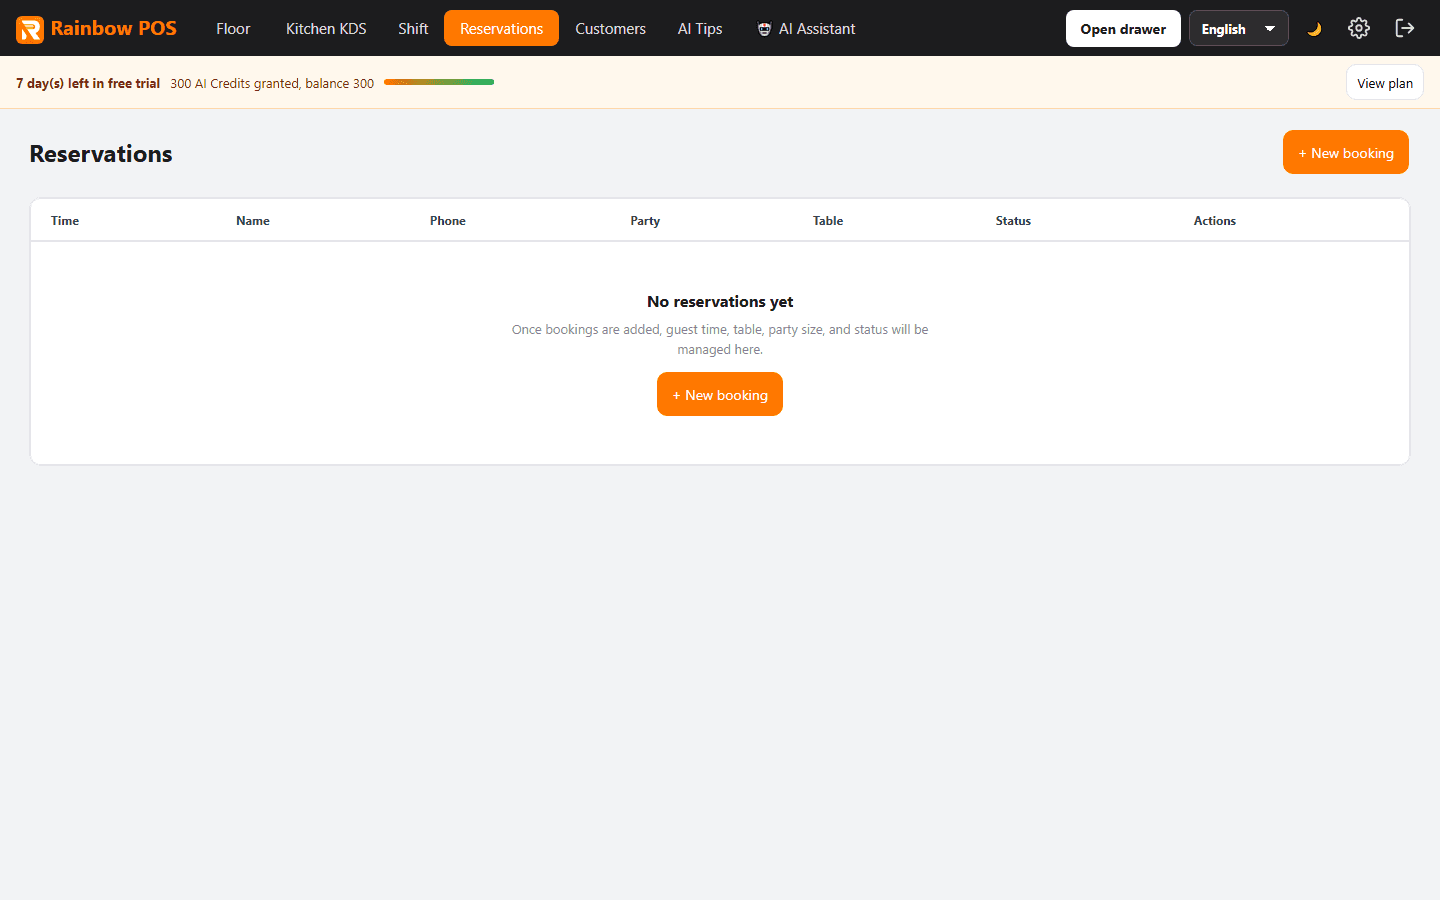
17. Manage reservations
- Open Reservations.
- Select + New reservation.
- Enter the guest name, phone, arrival time, and party size.
- Select Save.
- When the guest arrives, find the booking and select Seat and open order.
18. Manage members and customers
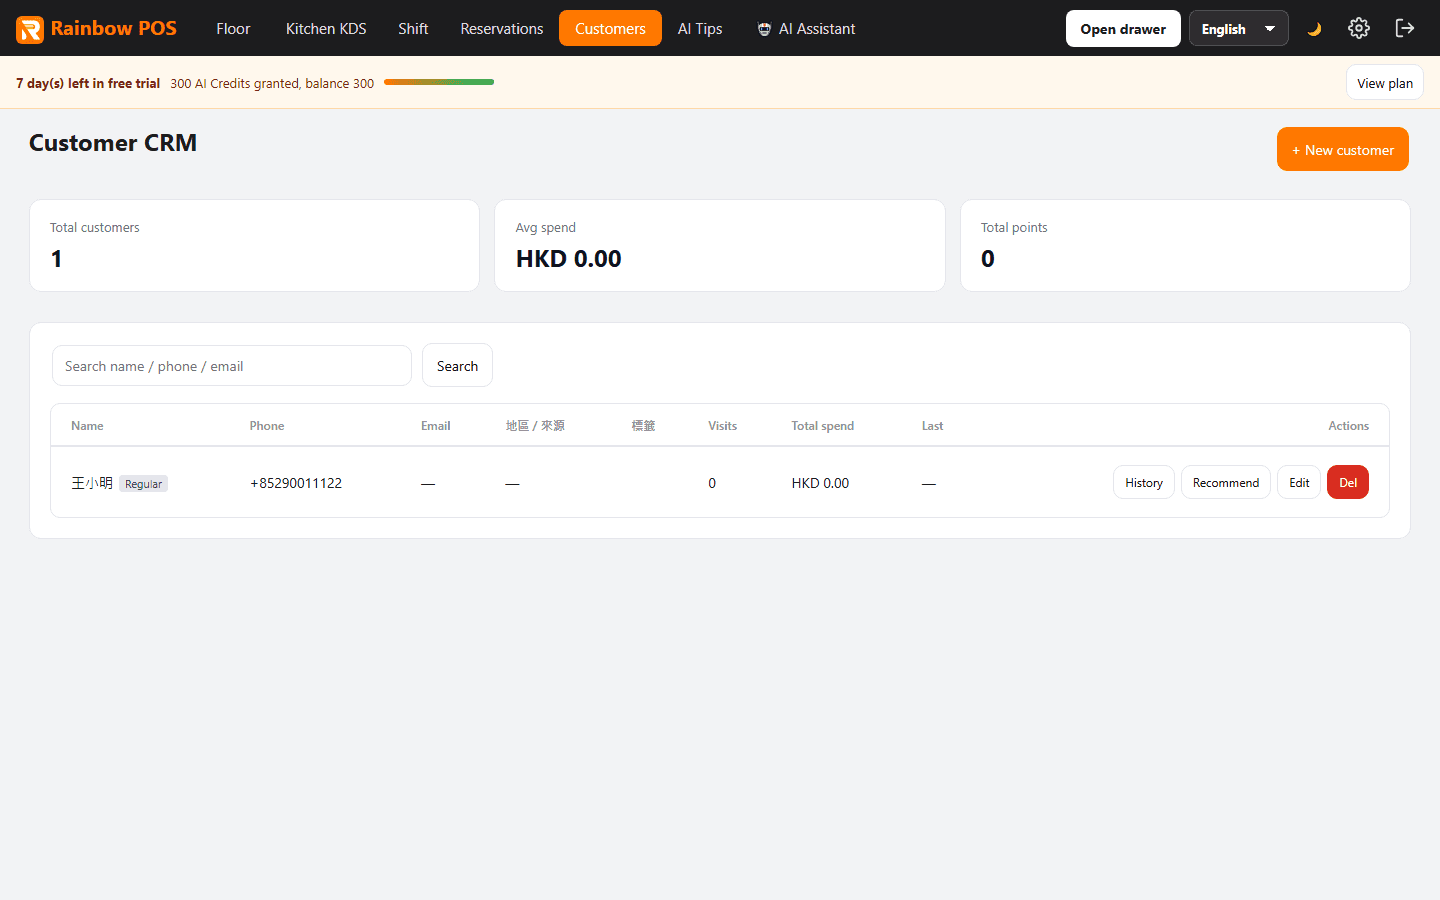
- Open Customers and create a customer record.
- Enter the name and phone number; optionally add birthday, tags, and notes.
- On an order, select + Add member.
- Search by phone or name and attach the correct customer.
- Continue ordering and checkout normally.
Customer profiles show visits, points, stored value, and purchase history.
19. Create promotions
- Open Settings > Promotions.
- Select Add promotion.
- Choose the rule, such as discount, scheduled offer, or buy-one-get-one.
- Set eligible items, conditions, dates, weekdays, and times.
- Save and enable the promotion.
- Test it with a sample order.
Promotion times use the restaurant time zone.
20. Let guests order by QR code
Restaurant setup
- Open Settings > Tables.
- Find a table and select QR.
- Download or print that table's QR code.
- Place it on the matching physical table.
- Scan it with a phone and test the full flow.
Guest flow
- Scan the table QR code; no login is required.
- Select dishes and modifiers.
- Select Add.
- Select Next, check the basket, and select Confirm order.
- Staff check the items in POS and select Send to kitchen.
Guests can scan again to add to the same open table order.
21. Manage inventory
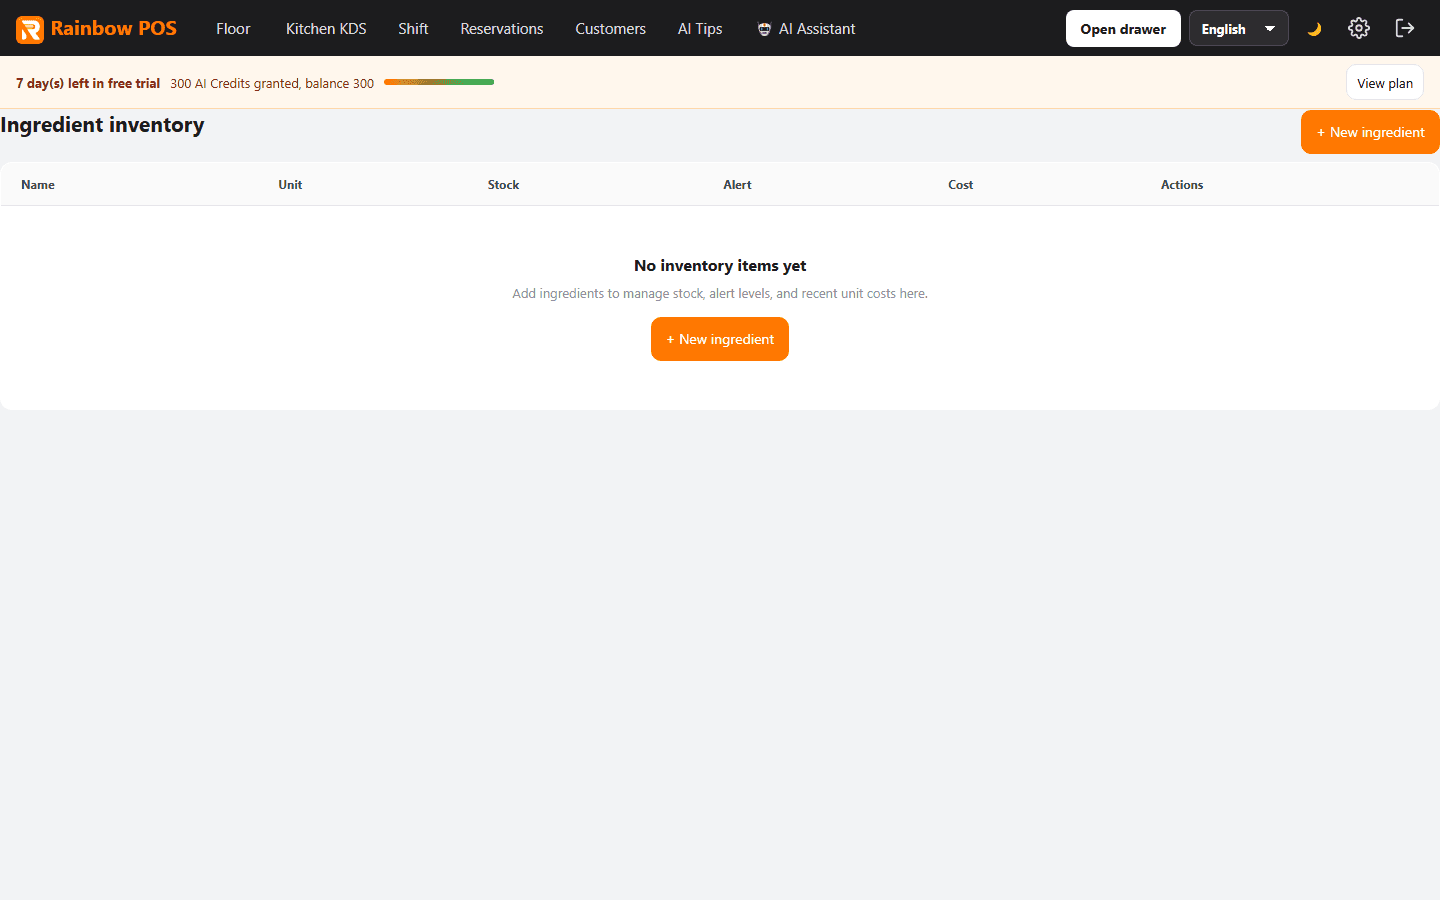
- Open Inventory.
- Select + Add ingredient.
- Enter the name, unit, current quantity, and safety stock.
- Save the ingredient.
- Record receipts, wastage, manual adjustments, and stock counts.
- Investigate low-stock warnings and reconcile regularly.
22. Review sales and operations
Open Settings and use the Operations group:
- Sales for orders, payments, and line-item details.
- Analytics for trends, busy periods, and dish performance.
- Owner daily for a concise daily operating summary.
- Timeclock for employee attendance.
Daily checks should compare the Z report with sales, payment providers, discounts, refunds, voids, and unusual orders.
23. Use Rainbow POS AI
AI features consume AI Credits. Always check the Credit amount shown before running a task.
AI Order: convert speech or text into order lines
- Select the AI Order icon or AI Order BETA on the ordering screen.
- Choose Voice or Text.
- Speak or enter a full order, including table, quantities, and modifiers.
- In Text mode, select Analyse order (10 Credits).
- Review matched dishes, quantities, combos, and modifiers.
- Answer clarification questions or choose from suggested matches.
- Select Add to order details.
- Check every line manually, then select Send to kitchen.
AI never sends the order or takes payment automatically.
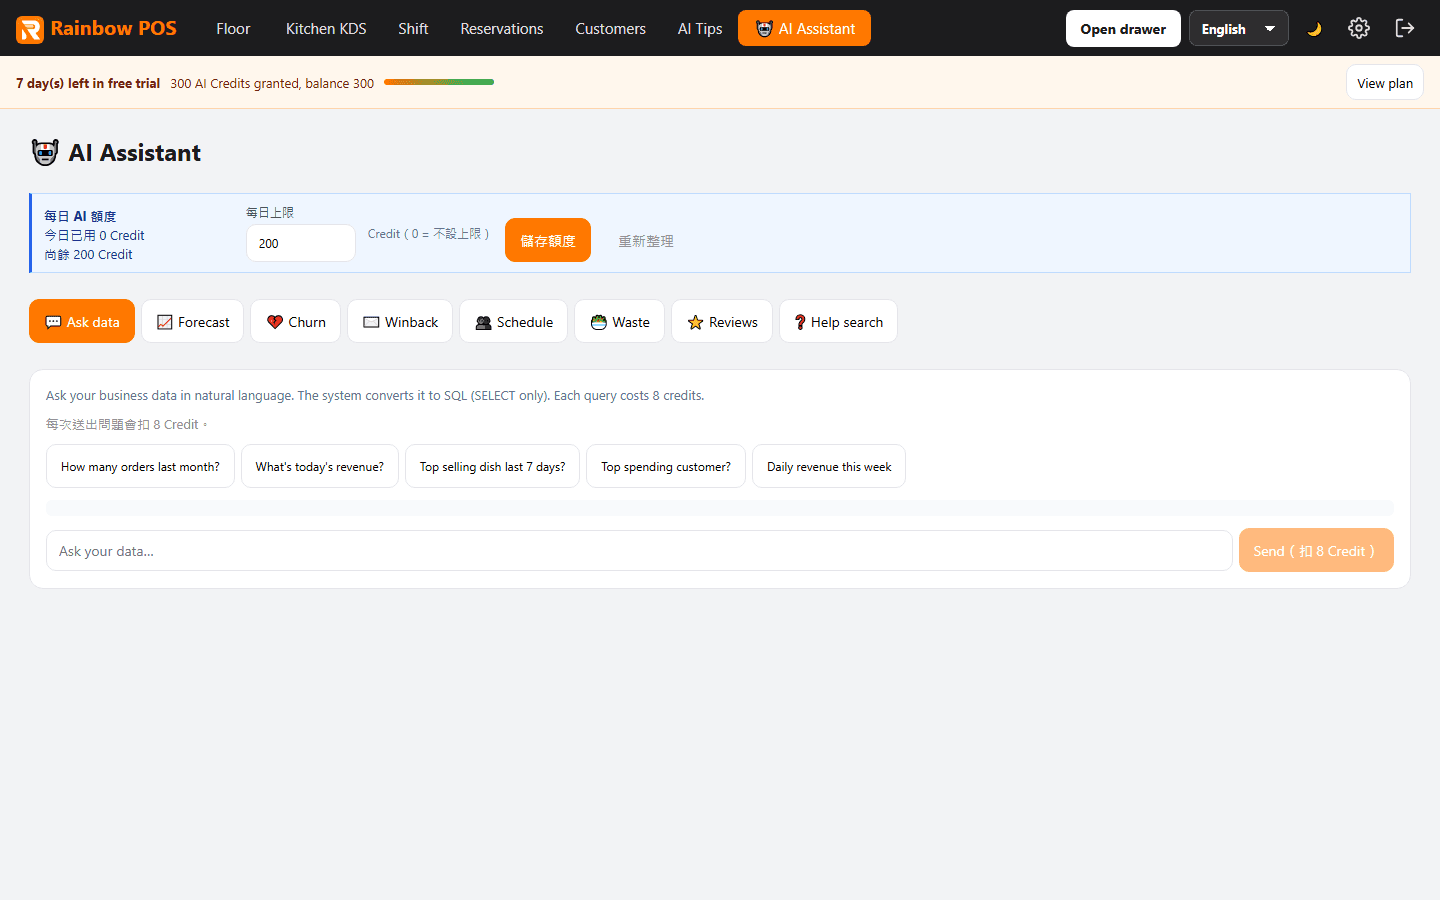
AI Assistant: Ask data
Each question costs 8 Credits.
- Open AI Assistant > Ask data.
- Ask a specific question with a time period and metric, such as:
- "What was today's revenue?"
- "Which ten dishes sold the most in the last seven days?"
- "Compare lunch and dinner average spend this month."
- Select Send.
- Review the explanation and result table.
- Continue in the same conversation for follow-up questions.
Use official Sales and Shift reports for final reconciliation.
AI Assistant: Forecast
- Open AI Assistant > Forecast.
- Select the next 3, 7, or 14 days.
- Review predicted quantities and the P90 preparation reference.
- Reload or recompute after major menu or sales changes.
- Adjust final purchasing for bookings, weather, holidays, and events.
AI Assistant: Reviews
Each review analysis costs 3 Credits.
- Open AI Assistant > Reviews.
- Choose Google, OpenRice, Foodpanda, or Other.
- Select the star rating when known.
- Paste the guest review and select Analyse.
- Review sentiment, urgency, topics, summary, and suggested reply.
- Verify facts and promises before publishing the reply.
Churn, Winback, Schedule, Waste, and Help are currently marked Coming soon.
AI Tips
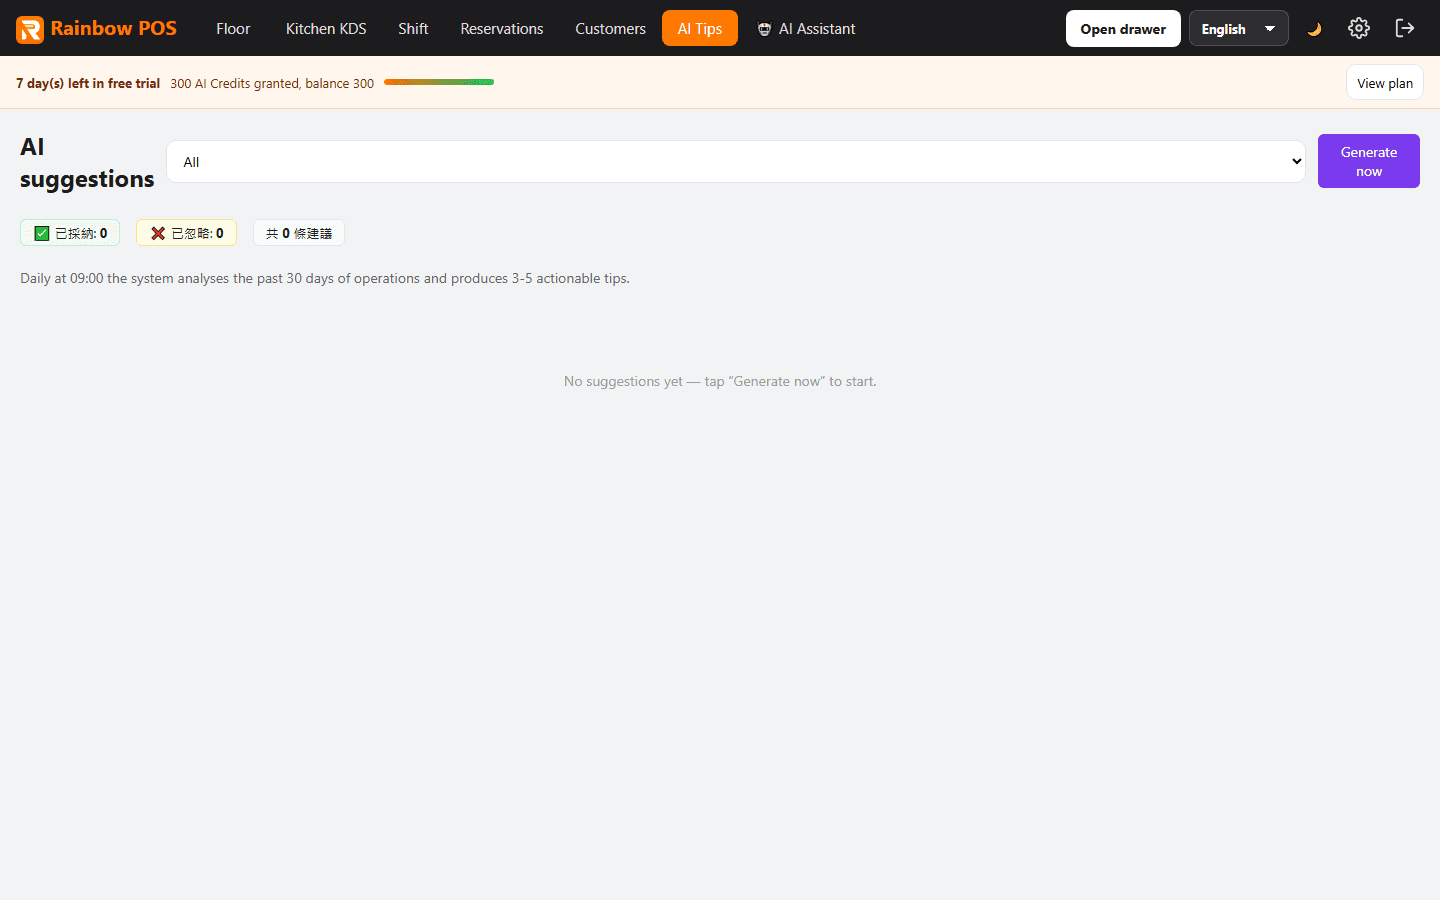
- Open AI Tips.
- Read the latest recommendations and severity.
- Select Generate new suggestions for a fresh analysis.
- Mark completed suggestions as Applied, or select Ignore.
- Use filters to review new, applied, and dismissed suggestions.
Marking a tip as applied does not automatically edit menus, inventory, promotions, or schedules.
AI Studio: create a poster
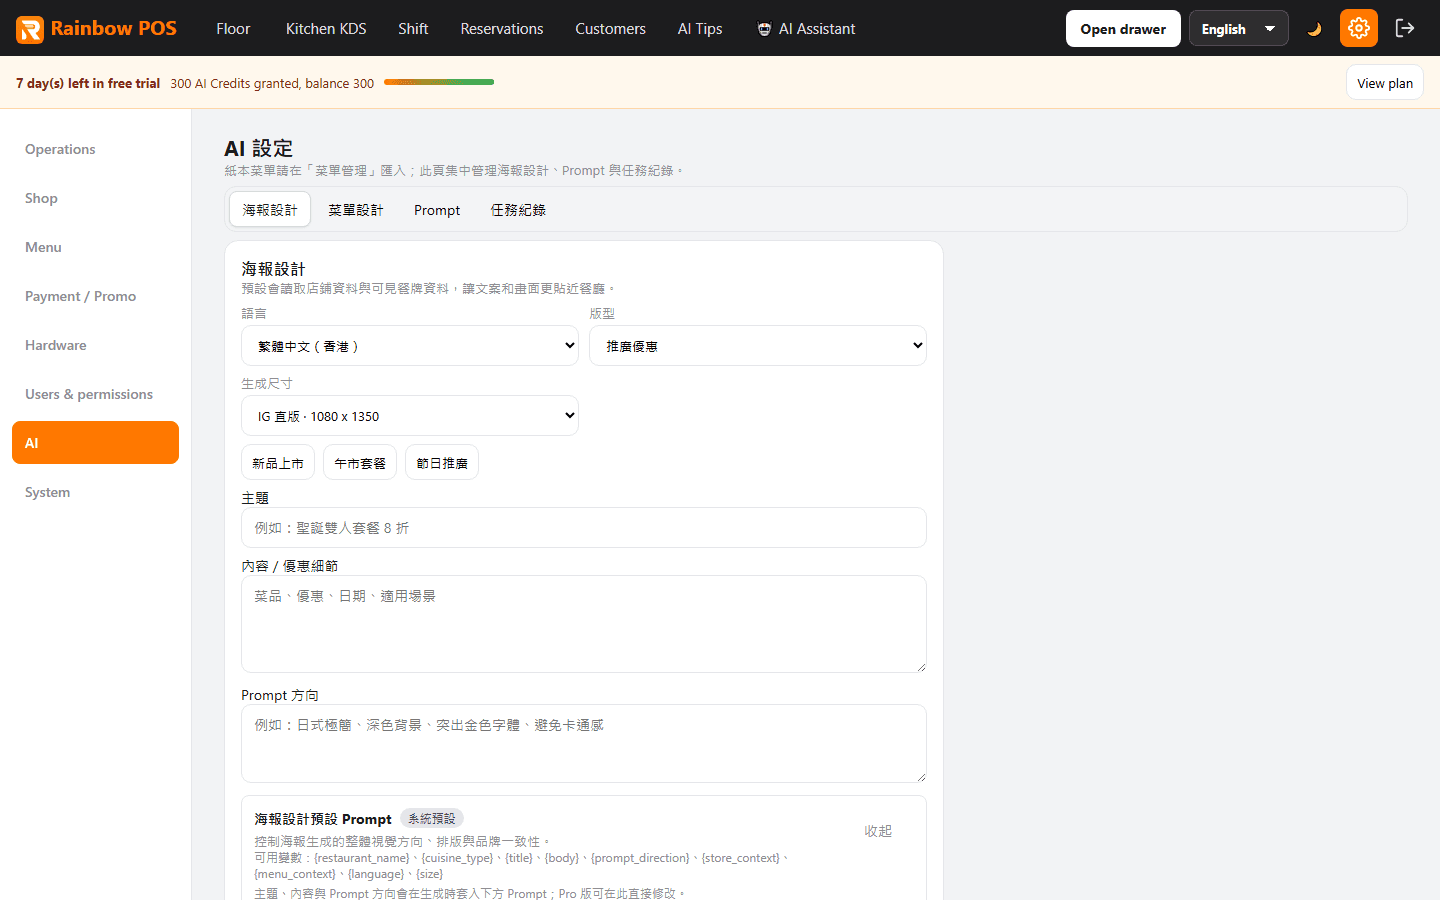
- Open Settings > AI > Poster design.
- Choose language, template, and size.
- Enter the campaign title, offer details, dates, and conditions.
- Describe the visual direction and optionally upload a reference image.
- Choose whether to use restaurant and menu context.
- Select a model and review its Credit cost.
- Select Generate poster.
- Verify dish names, prices, dates, and terms.
- Choose JPG or PNG and download the required size.
- Select Edit from this to generate a revision.
AI Studio: create a menu design
- Open Settings > AI > Menu design.
- Choose full menu, one item, combo, lunch set, or custom page.
- Choose language and output size.
- Enter the title, content priorities, and design direction.
- Choose context options and an AI model.
- Generate and check every dish name, price, and combo before publishing.
AI-generated images can contain incorrect text. Never print or publish without review.
Prompt, history, and daily budget
- Prompt shows the instructions used by each AI feature; eligible plans can edit them.
- Task history shows recent images, status, model, Credit cost, and downloads.
- In AI Assistant, owners and managers can set a Daily AI Credit limit. Enter 0 for no daily limit.
24. Troubleshooting
| Issue | What to check |
|---|---|
| Cannot open a second order on a table | Open the existing active order and add items there |
| Dish missing from ordering screen | Availability, sold-out status, service hours, and daily limit |
| Kitchen did not receive the order | Kitchen station assignment, KDS setting, printer test, and LAN print bridge |
| Incorrect cash change | Amount due, payment amount, amount tendered, and earlier mixed payments |
| Promotion did not apply | Enabled status, conditions, dates, times, and restaurant time zone |
| Cannot discount or void | User permission or manager PIN authorization |
| Shift cash variance | Cash movements, change, mixed payments, and counted cash |
| Need more help | Use Settings > Support ticket or the login-page support link |
Recommended learning path
- Owners and managers: Chapters 1-9, then shifts, members, promotions, inventory, reports, and AI.
- Cashiers and floor staff: Chapters 9-20, especially add-ons, QR orders, voids, mixed payments, and split bills.
- Kitchen teams: Chapters 4, 8, 10, and 12.
Features may vary by plan, permission, and restaurant settings. Where this guide differs from the live interface, follow the current Rainbow POS screen.